UV glue is a type of adhesive cured by exposure to ultraviolet light. It is widely used in various industries, such as electronics, automotive, and medical, due to its fast curing time and strong bonding capabilities. In this article, we will provide a step-by-step guide on how to use UV glue for optimal bonding strength.
Understanding UV Glue
UV glue is an adhesive composed of two key components: a resin and a photoinitiator. When exposed to ultraviolet light, the photoinitiator triggers a chemical reaction that causes the resin to harden, resulting in a strong bond.
Benefits of using UV glue over traditional adhesives include:
- Faster curing time:UV glue can cure in seconds, while traditional adhesives may take several minutes or hours to cure.
- More robust bonding capabilities:UV glue can form a strong and durable bond, even on difficult-to-bond materials like glass and plastics.
- Environmentally friendly: UV glue does not contain solvents, making it a more environmentally friendly option.
Preparing to Use UV Glue
Before using UV glue, gathering all necessary tools and materials and preparing the surfaces to be bonded is essential. Here are the steps:
Gather necessary tools and materials:
- UV glue
- UV light source (e.g., UV lamp, LED light)
- Protective eyewear and gloves
- A clean, dry cloth or alcohol wipes
Prepare the surfaces to be bonded:
- Clean the surfaces thoroughly with a clean, dry cloth or alcohol wipes to remove any dirt, dust, or grease that may interfere with bonding.
- Ensure the surfaces are dry and free of any moisture, as this can weaken the bond.
- Sand or roughen smooth surfaces to improve adhesion if necessary.
Ensure proper ventilation and safety measures:
- Use UV glue in a well-ventilated area to avoid inhaling fumes.
- Wear eyewear and gloves to protect your eyes and skin from UV exposure.
Applying UV Glue
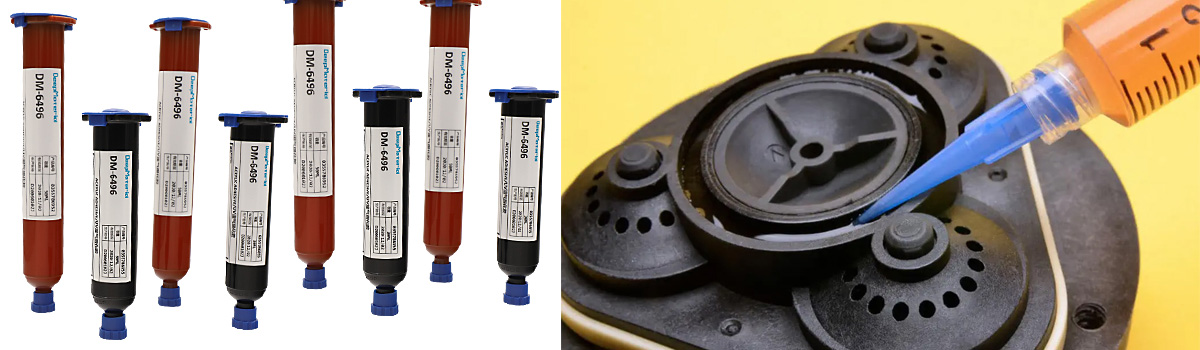
Apply a thin layer of UV glue to one surface:
- Use a brush or dropper to apply a thin and even layer of UV glue to one of the surfaces to be bonded.
- Avoid applying too much glue, as this can cause messiness and potential weakening of the bond.
Align and position the two surfaces to be bonded:
- Carefully align and position the two surfaces to be bonded, ensuring they are correct before proceeding to the next step.
Curing the adhesive with a UV light source:
- Place the bonded surfaces under the UV light, ensuring the light source is the correct distance from the characters.
- Turn on the UV light source and expose the surfaces to UV light for the recommended curing time. The curing time can vary depending on the type of UV glue being used and the thickness of the glue layer.
- Rotate the surfaces to expose all areas to the UV light source for complete curing.
Checking for proper adhesion and making any necessary adjustments:
- After curing, check for proper adhesion by gently pulling the two surfaces apart. If the bond is weak enough, reapply the UV glue and repeat the curing process.
- Make any necessary adjustments to ensure the surfaces are correctly aligned and positioned.
Tips and Best Practices for Using UV Glue
To ensure optimal bonding strength, here are some tips and best practices when using UV glue:
- Choose the correct type of UV glue for your specific application.
- Ensure proper curing time for maximum bonding strength.
- Use a UV light source with the correct wavelength for the UV glue being us for the bond.
- It is important to note that different types of UV glue may have varying curing times, so follow the manufacturer’s instructions for optimal bonding strength.
Using a UV Light Source
UV-curing adhesives are designed to cure quickly and efficiently when exposed to ultraviolet (UV) light. The process of curing using a UV light source is a critical step in the application of these adhesives. Below are some important considerations when using a UV light source:
Proper wavelength: Each UV curing adhesive has a specific wavelength range that can be fixed. Using a UV light source with the appropriate wavelength for the adhesive is essential. Please do so to ensure complete curing and strong bonding.
Intensity: The intensity of the UV light source should also be considered. The curing process may take longer if the light source is not intense enough, which can result in stronger bonding. On the other hand, if the light source is too fierce, it can cause excessive heating of the adhesive, leading to deformation or cracking.
Distance: The distance between the UV light source and the adhesive should be carefully considered. The ideal length will vary depending on the intensity and wavelength of the light source, as well as the thickness of the adhesive layer. Generally, a distance of 1-2 inches is recommended for optimal curing.
Time: The time the adhesive is exposed to the UV light source is critical to curing. This time may vary depending on the adhesive being used, the intensity of the light source, and other factors. Following the manufacturer’s instructions for the specific adhesive being used is essential.
Using a UV light source is an essential step in applying UV-curing adhesives. The curing process can be optimized by considering factors such as wavelength, intensity, distance, and time, resulting in strong and durable bonds.
Achieving Maximum Bonding Strength: A Guide to Using UV Glue Effectively
- Make sure surfaces are clean and free of debris before applying the adhesive.
- Apply the adhesive in a thin, even layer to prevent messiness and promote optimal bonding strength.
- Avoid over-applicating the adhesive, as excess glue can lead to messiness and potential bond weakening.
Store UV glue in a cool, dry place away from direct sunlight to prevent premature curing.